Eco-friendly living for the practically minded.

Showing posts with label preserving. Show all posts

Monday, July 5, 2010

Curing garlic and shallots

I harvested the garlic and onion today! For all their gourmet-ness, these are both lazy-gardner's plants. We planted the garlic last November by shoving several cloves in the ground. (I use "Russian Red" because it stores well and has a nice strong flavor. I'm sure storebought works too, but if you're going to plant it, might as well getsomething strong!) We then completely ignored it. It popped up in early spring, out of the snow, and started going from there. We planted the shallots in spring, and then also ignored them.

So, both got nice and huge, and then started yellowing just before the 4th. Traditionally apparently, one harvests these on the 4th, and they looked ready, so we did!

This was our first year with shallots. They grow like onions, but in little bunches. Each shallot is about the size of a baby onion.
Saul planted about 10 shallots. Each shallot bunched off loads of babies, and we harvested over 70 shallots!
So, the "curing" thing. This is the one not-lazy part of these plants. Apparently you don't just pull them up and put them in storage. You have to encourage a nice protective layer of papery skin across the top so they don't rot. So, you set them out, tops and roots and all, in a warm and partly-sunny place to "cure". Once they're mostly dry, it'll be time to braid them and store them. So, out on the porch they go.
That's 17 garlic plants by the way. We went a little overboard this year....again. But on the other hand, we can always give them away, and I really like the garlic scapes we get from all of them in June.

Of course, the biggest ones we won't actually store. Those go in a separate space, to be planted in the fall! Best part about these plant: I don't have to order more plants or seeds ever again, and I don't have to baby any seedlings.

Continue reading ...

Tuesday, March 24, 2009

Preserving herbs, results from winter

Well, I did learn a little more about this. Parsley, oregano, thyme, and basil all dried well. I tried drying on the branch and off the branch; off branch was better. Somehow it was more colorful and flavorful. Plus, they dried faster.

Don't dry chives though, they were terrible. I've realized it's not worth it anyway, they were still growing in the snow and they came back over a month ago. (And with a vengeance, too...anyone need chives? I have like 7 plants now.) I was only without for a couple months, so no big deal.

Continue reading ...

Friday, September 5, 2008

Preserving herbs

Maja asked me about preserving herbs, specifically, freezing v. drying. So, a little late, here's what I figured out.

Last year, I tried freezing some herbs. There seems to be two methods for doing this:

1) Chop and freeze in a bag
2) Place in water and freeze in an ice-cube tray.

I tried both. #2 was pretty bad. Basically, the herbs float to the surface before they freeze, and then they get freezer burned. #1 was ok, but you can't measure it out. Basically, as soon as they thaw, they turn to mush, so you have to put them directly into the soup or whatever.

So, I'm just drying this year. However, I think it works best if you dry the leaves whole, and then crush them later as needed. I think it preserves the scent better.

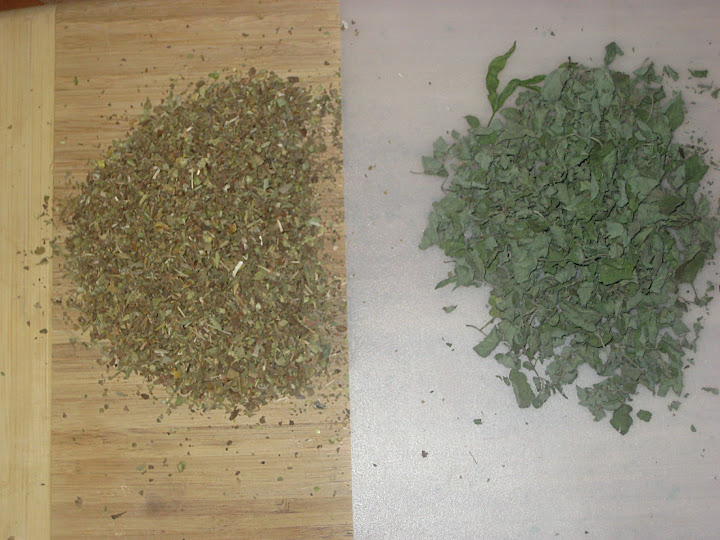
Unfortunately, you can't smell how amazing my dried parsley is, but here's the photo comparison of the store-bought parsley with my parsley.

Store bought parsley smells faintly of parsley, but mostly of "dried plant". Home grown parsley is the second strongest herb we grow. Saul put some in soup yesterday, and when I walked in the kitchen, that was all I could smell.

Continue reading ...